No-Render Quick Daytime Illustration
这个教程通过将 SketchUp 的图片导入到 Photoshop 中来创建一个日景的渲染图。
这意味着我们不再需要其他的渲染软件。这个渲染的效果并不一定十分逼真,相反,这个教程提供了一个可以快速美术渲染的方法,来渲染一张不像 SketchUp 样式的效果图。
This tutorial will create a daytime rendering by exporting images from Sketchup to Photoshop. This means no external rendering programs are needed. This rendering is not meant to be realistic, but instead, provide an option for quick artistic renderings without the “Sketchup” look.
VIDEO
教程步骤/STEP-BY-STEP TUTORIAL
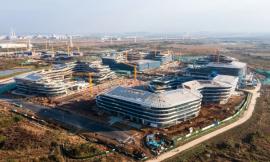
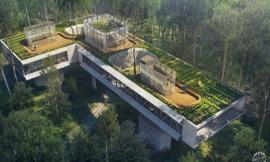
注意:我在地平面上插入一张谷歌地球(Google Earth)的插图,这将为最终的渲染图里增添一些真实感和纹理。
NOTE: I have inserted a Google Earth map image on the ground plane. This adds a little more interest and texture to the final rendering.
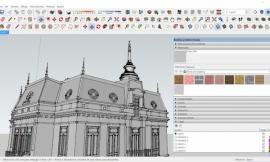
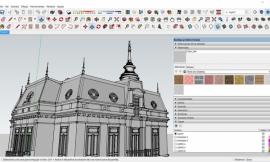
1. 首先,你需要在 SketchUp 里保存一个视角,因为你需要在同一视角导出多张图片并且在 Photoshop 里叠加它们。为了防止视角意外移动,我们可以在视图(View)-动画(Animation)-添加场景(Add Scene)里添加)。
1: First, a view should be saved because multiple images will be exported and overlayed in Photoshop. Accidentally moving the view will make it almost impossible to get the images to line up later. This can be done by going to View>animation>add scene.

2. 通过以下设置,在 SketchUp 中导出 2 张图片:
正面样式:阴影纹理, 边线样式:没有边线,开启阴影。
正面样式:X 射线,阴影纹理,边线样式:开启边线,开启阴影。
2. Export two images from Sketchup with the following settings:
FACE STYLE: Shaded with textures, EDGE STYLE: no edge lines, shadows on
FACE STYLE: X-ray and Shaded with textures, EDGE STYLE: edge lines on, shadows on.

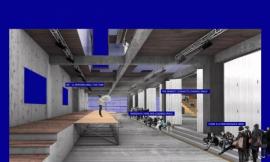
3. 打开第一张有阴影纹理,没有边线的图片。
然后在同一个文件里,新的图层中打开第二张X 射线、开启边线的图片,将这个图层放在第一张图片的上面,确保两张图片完全重合。
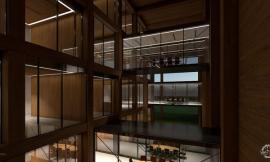
下一步,把 X 射线的图层(最上面的图层)的图层混合模式调整为叠加模式,混合模式在图层面板左上角的下拉菜单中找到。图片的组成与下图所示相似:
3. Open the first image- Shaded with texture, no edge lines- in Photoshop
Open the second image-X-ray with edge lines- on a new layer above the first image in the same document. Be sure the images line up over each other exactly.
Next, set the blend mode of the x-ray layer (the top layer) to overlay. Blending modes are found in a drop-down menu in the top left corner of the layers palette. The composition should look similar to the image below:

4. 创建一个新的图层,然后把它移到最上面。
这个图层将用作创建远距离的雾景,也可以隐藏谷歌地图的边缘。
选择画笔工具并做以下设置:软笔刷大小设置为 250,不透明度设置为 35%。
慢慢的涂擦背景,直至谷歌地图和模型的边缘消失。
(注意:避免涂到你不想涂擦的区域,使用多边形套索选择只想被涂擦的区域。)
4. Create a new layer and move it to the top.
This layer will be used to create the illusion of fog in the distance and also to hide the edge of the Google map.
Select the paint brush tool and use the following settings: soft brush size 250, opacity set to 35%
Slowly paint the background so that the edge of the Google map and model disappears.
(NOTE: to avoid painting areas you don’t want, use the polygonal lasso too to select areas to only be painted).

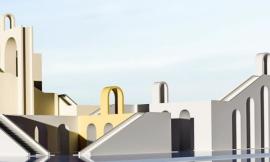
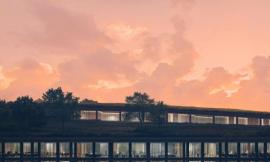
5. 接下来,创建一个新的图层,插入天空, 由于云彩接近地平线,我们需要抹去它们以及周围的建筑。
在这个渲染中,我通过去饱和,降低不透明度淡化了天空,不用清晰的、鲜艳色彩的云彩转移其对建筑的注意力。
5. Next, a new layer is created and a sky inserted. As the clouds get closer to the horizon, I erased them more as well as around the building
In this rendering, I really toned down the sky by desaturating it and lowering the opacity. I don’t want to draw attention away from the building by using bright colors and well-defined clouds.

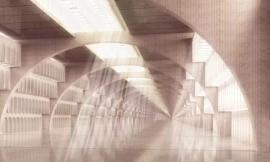
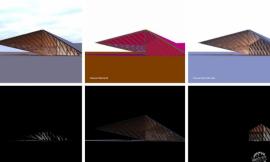
6. 再次建立一个图层,将它移到顶端。
选择画笔工具并且使用相似的设置:软笔刷大小设置为1000,不透明度设置为35%。
将颜色设置为黑色,继续涂抹画面的边缘,直到你得到如下图所示的类似效果,因为这是在一个不同的图层上,你可以调整使用不透明度得到适量的阴影,我通常在我的许多渲染图中使用这一步,这使得渲染图多了几分戏剧性并突出建筑的重点。
6. Create one more layer and move it again to the top.
Select the paint brush tool and use similar settings as: soft brush size 1000, opacity set to 35%
With the color set to black, paint around the edge of the rendering until you get a similar effect as the image below. Because it is on a different layer, you can play with the opacity to get the right amount of shadow. I typically apply this step to many of my renderings. It makes the rendering a little more dramatic and draws the focus to the building.

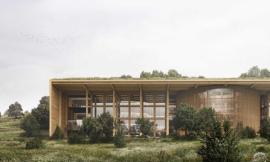
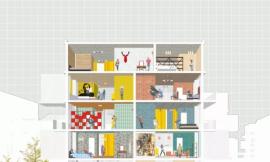
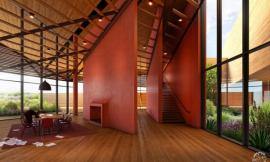
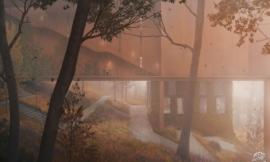
在最后的图片中,你会注意到我在河里Ps了一张水的图片,调整其他一些地方使得渲染图更加的逼真。我喜欢这个渲染的原因是它能很快产生,和传统的Sketchup效果相比,不使用复杂的外部渲染程序也会带有更强的艺术效果。
In the final image, you will notice I Photoshopped an image of water into the river and adjusted a few other areas which is more rendering specific. What I like about this rendering is that it is very quick to produce, but also that it has more of an artistic look to it compared to the traditional Sketchup look, with out using complicated external rendering programs.

出处:本文译自visualizingarchitecture.com/,转载请注明出处。
|
|
专于设计,筑就未来
无论您身在何方;无论您作品规模大小;无论您是否已在设计等相关领域小有名气;无论您是否已成功求学、步入职业设计师队伍;只要你有想法、有创意、有能力,专筑网都愿为您提供一个展示自己的舞台
投稿邮箱:submit@iarch.cn 如何向专筑投稿?