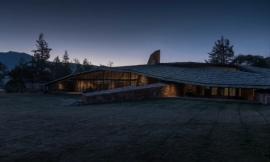
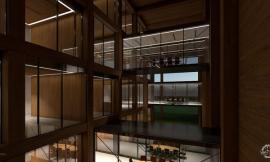
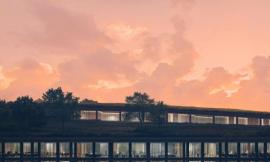
I was getting a little nervous there thinking I would run out of time but luckily I was able to squeeze this in before the holidays. This courtyard view represents the 9th Winter special image that I have created for this website. It is also the first highly detailed image that I have created for my new MIT (Massachusetts Institute of Technology) personal visualization project which allowed me to really think through many of the details that I have been juggling in my head. This image was quite time consuming for me because I am spending more time than normal on the little details: the materials, the reflections, the aging of the building, etc. I am working on pushing every part of the image to the same level of quality and resolution which means I can’t hide behind Photoshop as much or other quick fixes like in the past. I’m excited with how this first image in this project series has turned out and am looking forward to the other illustrations to come.
Below is a break down of the image and a closer look at the process I used to create the snowy walkway.
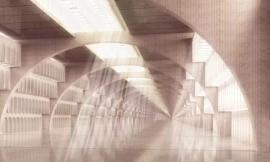
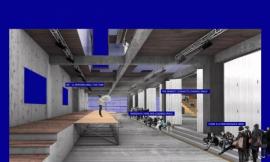
The one thing I wanted to point out in this screenshot is that I am using 3D people in the interior. The view point into the lower café was too difficult to find people at the proper angle to Photoshop in. Therefore, I fully modeled the interior and dropped in 3D people to avoid the headache of trying to stitch 2D people into that scene.
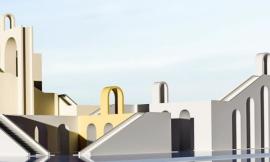
I built the dark steel material from scratch because I had a very specific look that I was going for. That material carries through the entire project so I needed it to be high quality and large enough to not show tiling. I also built the paver material in the sunken plaza from scratch and created a reflection map to give the texture a wet look.
The process of adding the snow began with setting up a material override in V-Ray for some of the ground textures so that it renders out white. I wanted to create the effect of people’s footprints creating a slushy path through the plaza. The plan was to mask away the white material override rendering to reveal the wet stone material below.
I searched through Google and built up a library of images of people’s footprints through the snow. I then began bringing them into Photoshop, desaturating the color, and built a black and white image of how I wanted the snow to be masked away. White represents where the snow would stay and the black represents where the snow would be masked away revealing the wet ground below.
泥泞的足迹的最终成果
Final Slushy Footprint Result
黑白图像完成之后,我把它复制到白色材质的蒙版图层中。
Once the black and white image was complete, I simply copied it into the “Layer Mask” of the white material override layer.
4、最后的雪地细节
4. Final Snow Details
雪地的细节
Snow Details
广场有着很好的位置,因此我添加了细节雪地的细节,比如水平表面和角落的一些堆积的雪。
With the plaza at a good place, I added in the remaining snow details such as the snow collecting on the horizontal surfaces and in the corners of the scene.
As much as I tried to get things resolved in 3D, there was still tweaking I needed to do over many of the materials. This mostly consisted of adding in imperfections such as adjusting the reflection in some of the steel panels, aging the brick façade, and adding dirt stains along the roof line. I also reworked the glass to resolve some of the reflection issues and added details inside the space.
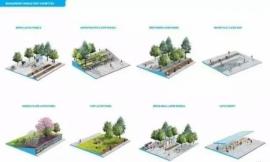
6、树木和人物
6. Trees and People
树木和人物
Trees and People
这个部分操作得很快速,但是我意识到我需要好一点的冬季树木材质库,因为我不得不复制了同样的树木。
This part went relatively fast but I did realize that I need a better winter tree library. I ended up copying the same few trees over and over again.
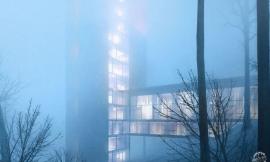
I applied very little final effects or color grading to the image. I did push the image a little darker just because I wanted to play up the contrast of the dark steel with the bright white sky. I think the mood landed right where I was aiming and didn’t require any drastic atmospheric effects or coloring.