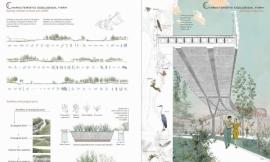
山地小屋案例研究
Mountain Lodge Ground Study
由专筑网李韧,杨帆编译
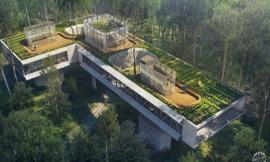
本教程的进度较快,我想展示的其实是另一个一直想完成的图像。这张图像主要用于研究建筑场地的相关场景。我也想表达一些对于景观的理解,以及桥体后部的细节展示。以下是分解步骤,在其中你会清晰地理解操作过程。但是雾景图像并不是我的最终目标,这只是一个研究过程而已。
This will be a quick post, but I wanted to show another image that I have been working on. This illustration was put together to study the ground around the base of the tower. I wanted to iterate on some ideas I had for the landscape/hardscape relationship as well as what some of the details are for the back side of the bridge. Below is a really fast breakdown of the image. You will see that I layered in the fog on several steps. I didn’t set out to make this image a fog scene, but it ended up going in that direction as the image developed.
1、粗略的基础渲染
首先,是通过PS强调钢材的肌理,这一步骤花费了较多的时间,因为我尽量让部分钢材能够表达阴暗处的效果,这样可以使画面看上去更加立体一些。然后为了不让立面材质看上去过于完美而显得有些假,我还在面板上添加了一些污垢贴图。
1. Roughing Up the Base Rendering
One of the first things that I did was rough up the Corten steel texture a little more in Photoshop. I spent a lot of time building a texture that would render out half way decent in V-Ray without showing tiling. However, the material was still a little too perfect so I darkened up some panels and added dirt overlays.
2、场地
地面上需要大量的肌理,例如镶嵌在草地之中的石板路。而图像的场景不断地向下方移动,因此我在场地上增加了一些暖色调,这样看上去会有些不自然,不过在后期增加雾气之后,效果会真实很多。
2. Ground
The ground needed a lot of texturing. I wanted the stone paths to feel as if they were meandering through wild grasses. The image shifted to a fall scene about midway through the process, so I added warm overlays to the grass. The overlays are a bit strong and unnatural, but once the fog is added, things calm down a bit.
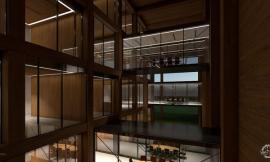
3、室内空间和人物
这类似我制作的上一个图像,我希望能使整个画面安静下来。因此,我减少了人物的数量,只是添加了一个看报纸的人,然后在墙体上设置灯光,来表达内部空间的相应功能。
3. Interiors and Entourage
Similar to the last illustration that I posted, I wanted the feeling of this image to be quiet and contemplative. Therefore I minimized the amount of entourage. I added a person reading a newspaper, some sconces on the wall, and hints of activity in the interior.
4、雾气和雾景效果1
第一次的雾气设置是为了让整个画面具有空间感,右边明亮一些,而左侧则有一些晕影。
4. Fog and FX’s Round 1
The first round of fog that I added was to setup the overall gradient of the image with the right side being brighter, and the left getting some vignetting.
5、雾气和雾景效果2
在第二次的雾气设置中,我增加了一些前景树,这样让空间更有层次感。
5. Fog and FX’s Round 2
For round 2, I added some foreground trees, and layered in a bit more fog and haze.
6、雾气和雾景效果3
最后,我仍然添加了一些前景树,并且增添了最后一层雾气,这使钢材表面看上去有些朦胧感,因此我增加了一些暖色,帮助钢材回归固有的色调,同时也提亮了画面的景观效果。另外我还在建筑底部增加了一些绿色藤蔓等其他细部设计。这就好像如上文所提到的,我只是用设计来构思一些想法,一切并未成定数。
6. Fog and FX’s Round 3
Finally, for the last round, I added several more foreground trees and branches and added in another layer of fog. The Corten steel was getting a little washed out so I painted in some warm overlays to bring back the orange tones of the steel as well as to brighten up the landscape. You may also have noticed that I added more ivy growing at the base of the tower and some other finishing details. Like I said at the beginning, I am still testing out ideas with the design so things may still change.
|
|
专于设计,筑就未来
无论您身在何方;无论您作品规模大小;无论您是否已在设计等相关领域小有名气;无论您是否已成功求学、步入职业设计师队伍;只要你有想法、有创意、有能力,专筑网都愿为您提供一个展示自己的舞台
投稿邮箱:submit@iarch.cn 如何向专筑投稿?