Cliff Retreat: Finale Image
由专筑网韩平,刘庆新编译
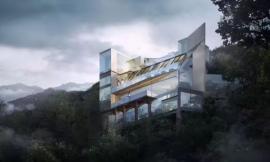
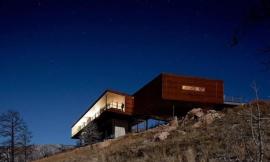
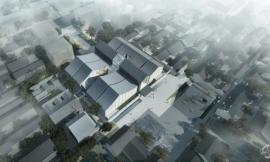
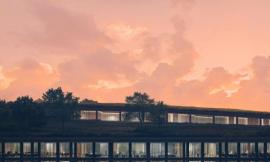
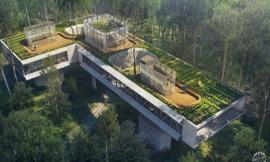
我希望这个效果图能够更有趣,并突出建筑的规模,同时也能接近最终的效果图。虽然我已经整合了一些特写的透视图,但是还没有一个可以展现整个建筑体量的效果图。我选择了一个既能展示地平面,又能展现悬崖别墅临水特色的视角。但是由于视角参数的原因,我无法直接获得适合的效果图。因此,我必须将许多背景图片拼贴起来以获得最终的效果图。以下是该效果图制作的快速分解步骤。
I wanted to have some fun with this image and create something that conveyed the scale of this project. Sort of a grand finale image. I have already generated a lot of close-up vignettes, but nothing really showing the project its totality. I chose a view that would grab some of the horizon, but also show the cliffs crashing into the water below. Because of the parameters of the view, I didn’t have an aerial image that I could just patch my project into. I had to create something from scratch by stitching many context images together. Below is a quick break down of the illustration.
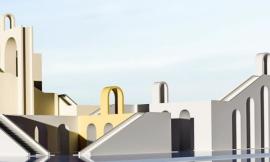
1. SU建模/1. Sketchup Model
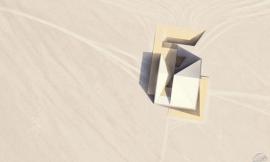
以上SU模型展示了整个悬崖的高度,这有助于我在PS中正确地框选纹理的尺寸。
Above is the Sketchup model showing the full height of the cliff to help me scale textures properly in Photoshop.
2. V-Ray 基础渲染图/2. V-Ray Base Rendering
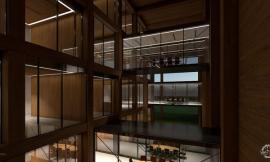
以上是由V-Ray直接渲染的基础图片。我增加了几个点光源来照亮建筑室内以及一些外立面。最终的渲染分辨率达6000px X 3333px。这个分辨率高于我以往的渲染设置,这是因为我希望尽可能地保留建筑的细节,尽管在这个图片中建筑非常小。
Above is the base rendering straight out of V-Ray. I dropped in a few omni lights to light up the interior and highlight some of the exterior facades. The final rendering had a resolution of 6,000px X 3,333px. The resolution is a little higher than I normally render because I wanted to maintain as much detail as I could with the architecture being so small in the image.
3. 环境背景/3. Context
设置环境背景的第一步是收集大量的图片。我收集了50张冰岛悬崖的图片,它们都符合我设置的不同的场景要求。我在收集图片花费的时间远远多于我在PS中的拼贴时间。
The first step in setting up the context is collecting a ton of images. I collected about 50 images of the Iceland cliffs that covered all of the different scenarios in my scene. I spent more time looking for images than I actually did piecing them together in Photoshop.
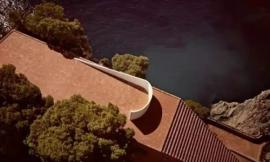
4. 悬崖前景/4. Foreground Cliff
我首先进行了悬崖前景的设置,因为这与建筑关联最大,而且它直接影响了最终合成照片的整体效果。其中,最困难的是寻找到一个分辨率足够高且角度合适的图片。我最终使用了三张图片并且将它们进行一定的扭转以适应透视角度。
I started with the foreground cliff since this interacts the most with the architecture and will inform how the rest of the image would be composed. The hardest part was finding an image at a high enough resolution and at the correct angle. I ended up using three different images and distorting them quite a bit to match the perspective.
5. 悬崖背景和水面/5. Background Cliffs and Water
图片底部拍打悬崖的浪花可以算是整个效果图中比较重要的部分。同样,最困难的就是收集一个角度合适而且波能适中的图片。最后,我将两个不同的图片结合起来得到了我想要的效果。此外,我也增加了一些悬崖背景图片以打破地平线,并给整个图片增加一些深度。
A very important part of this image was the waves crashing at the base. Again, it was difficult finding something at the correct angle and with the right amount of wave energy. I combined two different images of the ocean to get the look that I wanted. I also added some background cliffs to break up the horizon line and give some depth to the illustration.
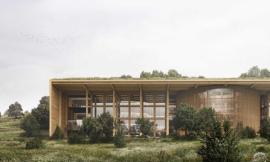
6. 草地和天空/6. Grass and Sky
增加的草地延伸到整个场景的尽头,并把所有的悬崖纹理都联系在了一起。草地本身是由三个不同的图片进行多次的复制和仿制而成的。最后再增加一个简单的夕阳渲染,整个背景就完成了。
The grass was added towards the end to tie all of the different cliff textures together. The grass itself was made up of three different images copied and cloned many times. A simple dusk sky was added to complete the context.
7. 暗化/7. Darken
在完成了环境背景的设置后,我可以开始调整整个图片的色调。我增加了灰色/蓝色的叠加来暗化除天空之外的所有场景。我调节了基础建筑渲染图的色阶以暗化建筑外部使得内部的灯光渗透出来。(在本篇文章中你可以找到暗化的详细操作过程。)
After completing the context, I could start adjusting the overall tones. I added a grey/blue overlay to darken everything except for the sky. I also adjusted the levels of the base rendering architecture to darken the exterior and punch up the light in the interior. A better description of this darkening technique can be found in this Post
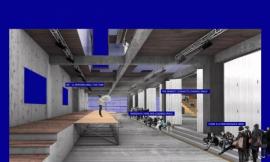
8. 细节/8. Details
在这一步,我花了一些时间调整立面的色调,并手动增加了一些新灯光。这有助于突出建筑嵌入地面的特征,同时也活跃了一些重要空间的氛围,比如通向瞭望平台的大楼梯。我还添加了人物、阳台花园、更多的室内纹理以及一些通向远方的道路。(在这里你可以找到手动增加光源的方法。)
In this step, I spent some time tweaking facade tones, and manually adding in new lights. This helped to highlight slits in the ground as well as activate important spaces such as the grand stair going down to the lookout platform. I also added people, the garden on the balcony, more texture to the interior, and paths leading off into the distance. More on the technique of manually adding light can be found HERE.
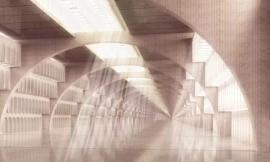
9. 大气层和色彩/9. Atmosphere and Color
针对建筑的细节,我们试验了不同的大气场景。大气的设置是很微妙的,稍有不慎,雾气和云层就会过多。但对于最后的效果图,我希望达到雾气像是从海面升起的效果。我插入了更多的色彩叠加,去除了蓝色和紫色的色调。我还利用了在《码头设计:雾天早晨渲染图》教程中提到的雾气和大气添加技术,增加了一些深度。
With the details in place, I experimented with different atmospheric conditions. The key here is to be subtle. It’s easy to overdo it with the fog and clouds, but with this image, I just wanted to give the hint of some fog rolling in from the ocean. I also inserted more color overlays and moved away from the purple tones to blue tones. I go into more depth with techniques of adding fog and atmosphere in my Foggy Wharf Post and my Atmospheric Fog Tutorial.
出处:本文译自visualizingarchitecture.com/,转载请注明出处。
|
|
专于设计,筑就未来
无论您身在何方;无论您作品规模大小;无论您是否已在设计等相关领域小有名气;无论您是否已成功求学、步入职业设计师队伍;只要你有想法、有创意、有能力,专筑网都愿为您提供一个展示自己的舞台
投稿邮箱:submit@iarch.cn 如何向专筑投稿?