Making of Eames House
由专筑网骆馨燕,刘庆新编译
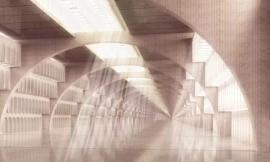
埃姆斯住宅,同时又被称为Case Study house 8,在1949年用预置构建装配而建成,被认为是20世纪最伟大的建筑之一。Sava Zivkovic最近在研究埃姆斯住宅的同时完成了关于住宅的动画的制作,同时他也慷慨的将制作过程分享在了这里。
The Eames House is widely considered as one of the great buildings of the 20th century. Also known as the Case Study house 8, this beautiful piece of architecture was constructed in 1949 using only prefabricationand off-the-shelf materials. Sava Zivkovic recently published his personal animated short where he tried to capture the essence of the house. This project of his is in many ways a case study of its own, and the making of it is kindly being shared by him here. Enjoy!
作者介绍:Sava Zivkovic
Sava Zivkovic在塞尔维亚贝尔格莱德应用艺术学院学习室内以及家具设计,于2012年毕业。自从他在Whale Shark工作室兼职工作后,接触完成了从logo动画制作到建筑可视化商业设计等方面的项目。
Author: Sava Zivkovic
Sava Zivkovic studied interior and furniture design at the Faculty of Applied Arts in Belgrade, Serbia, where he graduated in 2012. Ever since he worked as a freelance 3d artist for Whale Shark Studio, there he worked on everything from logo animations through commercials to ArchVIZ.
介绍
首先,谢谢Ronen Bekerman给我了这个机会。我也曾从这个博客中获益良多,现在我可以回馈一些东西了。
Introduction
First, I’d like to thank Ronen Bekerman for this great opportunity. I’ve been inspired by the contents of this blog for years and now I can finally give something back.
为什么我选择埃姆斯住宅?
其实原因很简单,在学习生涯中我一直对Charles 和 Ray Eames的作品很感兴趣,并且我一直想对这个住宅做一些简单的描绘。
在我们进入学习之前先看一下我完成的短片:
Why did I choose the Eames House?
Pretty simple really, I’ve been fascinated by the work of Charles and Ray Eames throughout all my studies, and I’ve always wanted to do some sort of short depicting of the house.
Before we dive into it all – here is the animation :
这里还有一些镜头的小原画
And some shots breakdown too :
设计理念
这个动画的整个概念是在工作过程中不断生成的,没有预先的设定,我只知道要做成怎么样的氛围。
埃姆斯住宅是一个给人带来愉快的住宅。从美丽的草地,到屋内奇妙混乱的工艺品,一切都是建筑师或是画家仔细特意放置“错误”的形成的一幅多彩的拼贴画。
我决定跳过阴天或晚上的场景,单纯的就表现一个简单漂亮的白天的场景。并且,一开始我就清楚音乐在动画中是十分重要的,找对音乐是成功的一个关键因素。
在制作动画之前,第一步就是寻找当我建模、覆材质和打光时候的歌单。十分幸运的是,我早已找到了符合概念的音乐。
我想把整个动画制作成电影的质感,这就意味着2.35:1的屏幕宽高比,虚焦、闪光以及广阔的色阶,但是更多的注重于后期制作。
第一步工作以及收集参考文件
在做任何项目之前,我习惯把我的样板文件夹拷贝到当前工作文件夹中,使整个项目工作整洁而有条理。这会为我们节省很多时间,以免以后花精力搜索硬盘。
这是我的文件夹结构
The Concept
The whole concept for this animated short was evolving as the project went along, there wasn’t any pre-production or anything like that, but I did know what tone I wanted it to have.
The Eames House is a happy place. Everything from the beautiful meadow it is located in to the wonderfully chaotic “mess” of artifacts inside the house is a colorful collage that the architect and the painter carefully placed or misplaced with that in mind.
I decided to skip any overcast or night scenarios, just go for a plain and simple beautiful sunny day. From the start I also knew that the music would play a big role, and finding the right song was crucial.
The first step was to create the playlist that I’ll listen to while working on the modeling, texturing and lighting before I go into animation. Luckily I was able to find the right track that fits the concept perfectly in my opinion.
I wanted to make the whole animation look as cinematicas I can get it. That meant 2.35:1 aspect ratio, anamorphic bokehand flares as well as extensive color grading, but more on that in the post-productionsegment.
First Steps and Gathering Reference
At the start of any project I copy my template folder structure to the project folder. I like keeping things clean and organized, and it saves me a ton of time otherwise spent sorting through hard drives.
Here’s my file structure.
我习惯于给自己的工作预先设定好一些预先配置文件,比如说我就在asset文件夹以及post文件夹放置了与之文件。当我每进行新的项目的时候就可以避免重复进行设置,直接进行工作。
由于我对埃姆斯住宅十分熟悉,好的参考图片的收集并不是那么困难。而且我有两个朋友参观过那儿,使得我有更多的参考图片。埃姆斯住宅的导览视频就放在官网上,更别说还有其他的文件了。我把参考资料分成了室内和室外两个文件夹。
这里是我的两个参考文件夹
I like to give myself a bit of a head start, so for example I have a preset max file in assets folder and presets for after effects in post folder. That way I avoid doing the same daunting steps every time I start working on a new project and just dive into it.
Reference gathering went by quickly as I’m fairly familiar with the house, and finding good reference isn’t all that difficult. Two of my friends visited the house so I had even more reference photos to work from. There are also some good video tours at the Eames Office website, not to mention the great documentary. I divided the references into two sub folders, one for the interior and one for the exterior of the house so I could easily find what I need.
Here are two reference boards I threw together.
一切准备就绪,我就开始建模了
After that everything was in place for me to start the modeling process.
建模
在做有些项目的时候,我会确认SketchUP的3d模型库中是否有可用的模型,并且的确模型库中已经有了很棒的模型,或者即使模型库中的模型对你的帮助很少,但不论怎么说,对你去再完善这个模型或者把它当作参考做自己的模型都是一个很好的开头。
我两种方式都用了,保留了现成模型的一部分,其他部分都是自己建的。这也是Alex Roman通常采用的一个很重要的技巧。并且你们也知道我们的重点不是建模,而是采用现成的模型去着重渲染。
我从梁柱开始建模,比例有点失调,但是很轻松地就把它们调回了正常的比例。
Modeling the House
Even though there were some good plans I wanted to see if anything is available on the SketchUP 3D Warehouse, and sure enough there were some very good models there. Even though those tend to import very poorly they offer a great starting point, whether you choose to fix the model or just use it as a reference and build your own.
I did a mixture of these two, where I kept some parts of the house and others modeled from scratch. This is a very fast and widely known technique by Alex Roman as I’m sure many of you already know It is important to note that this isn’t a modeling heavy project, I was relying on pre-made models to get to the main focus which was the animation.
I started off with the I beams, the proportion was a bit off but that was an easy fix just by scaling them a bit.
下一步是墙、窗户以及地板,都是基本建模步骤,没什么特殊的。
Next came the walls, windows and floors, really nothing special here, just the most basic box modeling.
我用了著名的Floor Generator (地板生成器)建厚木墙板。
For the wooden wall planks I used the well-known Floor Generator script.
地砖基本建成后,使用噪波生成器增加了随机性。当你在建模阶段的时候添加一些不完美的因素是十分重要的。如噪波调节器和倒角的添加可以使整个模型变得不一样,即使肉眼看不出来。细节很重要!
The floor tiles were also done with just box modeling but with a noise modifier applied to add some randomness. It is very important to add imperfectionswherever you can in the modeling stage. Small things like noise modifiers and edge chamfers can really make a difference later on, even if you don’t quite see it in the viewport. The subtle things do matter!
建完楼梯、铃铛等细节后,整个住宅的模型就完成了。
After just a few details such as the stairs and the doorbell the house model was finished.
大部分家具都是从SketchUP的模型库中下载的,并适当做了一些调整,就和前面建住宅一样。一部分现成家具比如起居室的椅子是从evermotion上下载的,另一部分是自己建的。
Most of the furniture was done the same way as the house, downloaded from the SketchUP 3D Warehouse and then improved upon. Some were pre-made models like the lounge chair from Evermotion, others I had modeled myself from scratch.
我自己做了一些沙发,上面覆盖着一些毯子和枕头。而这些一部分是使用3dmax本地布料素材建的,另一些是从evermotion下载的。
For the sofa I did some manual modeling and then covered it up with layers of blankets and pillows, some seamed with 3dsmax’s native cloth modifier others pre-made from Evermotion.
后面简单的建了一些灯的模型,以及使用Ivy Generator常春藤生成器建了悬挂着的装饰树枝。都是基本的必备物件。
Some more simple modeling for the lamps and Ivy Generator for the hanging dry branches. Just standard stuff here.
室内建模的最后一步就是细节了。
这个住宅有太多的小细节了,因此我都使用了现成的物件避免花费大量的时间创建每一个细节。并且,我前面也说过,建模不是重点。
The last step for the house interior was details.
Here it’s almost all pre-made stuff as there’s no way for me to spend weeks on modeling every single detail – The house just has too many, and like I said before this wasn’t my main focus for this project.
书也是现成的,但是我需要将它们放置好位置,以使它们看起来很自然。
The books were all pre-made, but I have placed each one by hand to get that random look.
简单的平面建模建成了胶合木板,并且使用涡轮平滑命令。
The plywoodsplints were made with simple plane modeling, and with shell and Turbosmooth modifiers applied.
放置完一系列的植物后,整过房子建模完成。
After a couple of proxyplants the house was done.
室外场景建模
住宅处在一片美丽的草坪上,四周围绕着密集的植物,为渲染提供了良好的环境条件,所以我一点也不担心周围临近的房子、道路或者水平线干扰它。
第一步我先建水平地面,再细分增添细节。这个案例我们只需要在两个区域实施这个操作步骤。
Modeling the Exterior
The beautiful meadow where the house is set worked out perfectly for the purposes of the animation. The house is surrounded by dense vegetation, so at no pointwas I concerned about neighboring houses, roads or horizon line for that matter.
The first thing I did was model the ground plane using the planemodeling, subdividing where it needed more detail, which in this case were only two areas around the steps.
我在地面上选择了一部分平面多边形单元分离并复制,应用了壳以及涡轮平滑命令建柏油路面。
For the asphaltI just selected some polygons from the ground plane, detached them as clone and applied shell and Turbosmooth. Easy stuff!
我使用Turbosquid中的多边形石块和Advanced Painter插件去开始增添细节
I used these low polyrocks from Turbosquid with Advanced Painter to start with some detailing
依旧是使用噪波生成器以避免生硬的直线和增添随意性。
Again two examples of how noise modifier can get rid of the perfectly straight lines and introduce some randomness.
我得把这个小物件放进去
And I just had to get this little guy in…
制作的渲染是我在这个项目中遇到的一个问题。我立即在脑海中想到了最好的建草丛的插件——MutiScatter。这个插件运行速度很快,并且容易编辑生成出令人满意的效果。
这是我用MultiScatter生成的模型库,里面有一些花草树叶。
The foliage was where I met one of the first problems with the project. I wanted to use what was in my opinion the best technique for the grass – MultiScatter. The plugin works great and gives a fast result which is very easily editable to reach a certain desirable look.
This was the model library set to be used with MultiScatter, a couple of flowers from iflowers collection, grass patches, some wild grass and leaves.
这是尝试使用MultiScatter草丛进行的渲染。
Here’s an early test with the MultiScatter grass .
尽管它看上去很棒,但是在后面渲染中它看上去很假,就像人工制品。幸运的是,了不起的V-Ray 3.0拯救了我。在我将V-Ray 升级到3.0后,闪烁停止了。因此使用的MultiScatter的前提是考虑其兼容性的问题。所以最后我必须用V-Ray Displacement modifier来制作草丛。
And it looked great, but the problem came later in the rendering stage, I had some nasty artifactsin all the foliage, but luckily the new and oh so awesome V-Ray 3.0 came out to my rescue. After I upgraded to 3.0 the flickeringwas gone but so was the ability to use MultiScatter due to compatibility issues. So eventually I had to redo the grass with V-Ray Displacement modifier.
这里有一个用置换草地很好的教程。
Here’s a great tutorial on doing the grass with displacement :
为了取得随机自然的效果我又一次使用了advanced painter script(散布脚本插件)使三叶草和野草分布在房子周围草坪上。如果没有这一步整个草坪看上去会过于干净,使场景不真实。
Again, to achieve as much randomness I used advanced painter script for the clovers and wild grass and scatteredthem around the house to compliment the grass. Without this it would have looked too clean, thus breaking the illusion of this lived in place.
我继续从Evermotion下载了一些低多边形树和灌木放在地面上,并且把他们转化为V-Ray 代理物件通过Advanced Painter随机分布在场景中。(我喜欢这个脚本)
那时候整个场景看上去是这样的:
After the grass was done I imported some low poly trees from Evermotion for the background and some iBushes, converted them to V-Ray proxy objects and placed them in the scene with Advanced Painter (I love that script).
At that point the scene looked something like this :
接下来添加英雄树。在埃姆斯住宅的右上方有一排漂亮的桉树,但是它过于特殊我在任何模型库中都找不到它,并且也十分难建模。我希望我能够有更多的时间去探究如何建它们,但是我不得不加快进度。所以我打开树木植物插件制作了17棵不同的大树。
Next step was to add the hero trees. Right in front of the Eames House there’s a treeline of beautiful eucalyptus trees that are far too specific to exist in any model library, and also very difficult to model. I wish I had more time to really delveinto modeling these, but I had to use a faster approach. So I busted open the good old onyx TreeStorm plugin and made 17 different hero trees.
我用了两层置换去添加多样性。首先在标准置换修改器中使用简单的对比强烈的随机图案添加不同的几何体。
I used two layers of displacement to add a bit of variety. First was standard displace modifier that added extra geometry using a simple noise map with strong contrast.
这样当覆材质的时候我就可以使用相同的遮罩使树皮的内外两层呈现不同的材质。第二步置换就是使用V-Ray Disp Modifier去添加小细节,这是使树皮显得真实的关键的一步。
在最后几步我添加了些罐子以及用Ivy Generator生成的常春藤,当然所有的都转化为V-Ray 代理物件。
Then, when texturing, I can use the same mask to have different materials for inner and outer layers of the bark. The second displacement was the V-Ray Disp Modifier to add all those nice little details. Using V-Ray Disp Modifier is crucial to having believable tree barks.
As a last few steps I added lots of pots and some ivy with Ivy Generator, all converted to V-Ray proxy objects of course.
这些就是全部建模的内容了,直白但是包括了所有的细节。
这里是隐藏了玻璃图层的白模渲染图。
That’s all for the modeling process, pretty straight forward stuff, but it’s all in the details.
Here are some clay renders of the finished model with hidden windows layer .
纹理和材质
这里我简单的提一下,因为我想花更多时间放在后期制作上。我只设置了标准V-Ray和混合V-Ray混合材质,这是在建筑可视化中惯用的手法。
为了加快速度,所有场景中的材质只通过标准uvw材质编辑器编辑,并不需要类似uvw展开编辑器等功能,因为这幢住宅比较简单。
继续从梁柱开始覆材质。这是应该使用和材质贴图中反射、凹凸光泽度等参数一致的简单的钢材。我对于每个材质都会检查菲涅耳反射,但是极少使用凹凸参数因为用不好容易失真。
钢材质和试渲染:
Texturing And Materials
This is going to be a short segment because I want to spend more time on the post production, and I only used two setups for material which are pretty common in ArchVIZ – Standard V-Ray material and V-Ray BlendMaterial.
Keeping up with the fast approach, everything in the scene was textured just with standard uvw modifier. No unwraps or anything like that, but the house doesn’t really require that approach either due to its simplicity.
Kicking off again with the I beams, it’s a simple steel set up with the same texture in reflection, bump and reflection glossinessslots. I always check the Fresnel reflections options for every material, and go fairly light with the bump as it can sometimes break the realism if miss used.
Steel material and test render :
添加了污迹的钢材质和试渲染
Dirty metal material and test render :
混凝土以及其他污迹材料的设置可能会复杂一些,但是也没什么特殊的。我使用V-Ray 混合材质通道先用主要混凝土材质作为基础材质,再将三层不同遮罩的相同污迹材质覆在上面。第一个会产生暗角的效果,第二层添加了细微的噪点,第三层遮罩在最上层添加了裂缝效果。
The concrete setup, and any other dirty material for that matter was a bit more complex, but nothing out of the ordinary. I used V-Ray Blend Material with the main concrete in the base material slot and three layers of the same dark dirty material but with a different masks. The first has a V-Ray dirt set as a mask so it would darken up the corners, the second is a very subtle noise mask and the third was the leak mask on the top of the model.
覆沥青也是同样的步骤。
Similar approach with the asphalt material :
我使用了从CGTextures.com下载的贴图创造污迹的效果,并将它们应用在V-Ray 置换修改器中。这样会使裂缝看上去更加有脏污的效果。这一步骤是不能忽略的。
I used some textures from CGTextures.com to create the mask for the dirt and applied the same texture to V-Ray displace modifier. That made the cracks look more dirty, and you can’t have enough of that.
这里是贴图:
Here’s the texture :
这里有一些列覆好材质的场景
墙壁同样设置了V-ray混合材质,但是使用了不同的裂缝和污迹贴图。
Here’s a couple of screens with a fully textured scene…
The wall materials are the same V-Ray Blend Material setup but with different leak and dirt texture masks.
草坪添加了蜂窝状纹理并转化成黑白色,其上的碎石添加了砾石纹理。
The grass is mapped with a cellular texture used for displacement and the gravelwith some gravel texture and a black and white version in displacement as well.
窗户玻璃增加了一点凹凸感以制造大多数玻璃并不平坦的效果。
The window glass material has some slight noise texture in bump slot to give it that unevensurface look that most windows have.
就像我前面介绍的一样,尽可能的添加随机性是十分重要的,因为在现实生活中没有什么东西是绝对笔直干净的。尽可能添加一些污迹和不完美的细节,但是要把控程度,这样会带来不一样的效果,使你的渲染更加真实。
Like I discussed earlier in the modeling part, it’s really important to introduce as much randomness as possible as nothing in real world is perfectly straight or in this case clean. Adding as much dirt and imperfection helps you get that realistic lived in look, and that’s exactly what I was after here. Of course you have to watch out not to overdo it, as it can add some undesirable effects.
灯光和渲染
因为是阳光充足的白天,所以用V-Ray 太阳光来渲染。是这样吗?
实际上我喜欢在环境面板中用V-Ray的标准天空和灯光系统,因为我可以控制整个区域的阴
最后我有了一个使用切片编辑器生成的巨大球体以及使用360度天空贴图的v-ray天光环境。这并不是用作照亮任何东西的,而是给整个环境一个较为温暖的氛围,同时这样可以使云彩反射在玻璃上,而不是仅仅一个天空的渐变。
Lighting and Rendering
Sunny day, so V-Ray Sun… Right?
Well, I actually used the standard direct light with a V-Ray Sky in the environment slot. I just prefer it that way, and I like to control the area shadows manually. I also made some V-Ray plane lights and positioned them on all the house openings to get a little more light in and just a couple V-Ray Sphere Lights for some lamps.
Lastly I had a giant sphere with a slice modifier and a V-Ray light material with 360 sky texture. This wasn’t lighting anything but it gave the scene a slightly warmer tone, and it helps to have some clouds in reflections rather than just sky a simple gradient.
这是对光源的基本操作,十分简单并适用在大部分场景的光源环境。
现在到了渲染步骤,就像你们大多数人想的一样,我使用V-ray。但是刚开始的时候,我就受到了一些约束。通常假如没有树灌木、组件,没有物件移动只是相机在动的时候,渲染是十分迅速的。使物件移动会大大增加渲染时间,这也是我受到的约束,因为我是在家中的两台工作站中渲染的。
关于渲染的设置,直到我试了solidrocks我就再也不用自己手动调节了。整个插件和它的Fly-through Animation Wizard简直就是节省时间神器,我简直不能用言语描述他的强大。通常在你渲染测试之后,你要开始细分材质,灯光和GI,然后重新计算灯光缓存,发光贴图才能开始渲染。有时候你会忘记设置一个步骤,有时候你会等不及缓存的计算,然后你会失去最佳的夜晚渲染时间,一大堆东西出错……只要你点击鼠标,solidrocks会为你准备好一切。
这是接口界面,你只要设置基本的GI,图片质量以及特殊渲染通道,整个插件就会自动为你计算准备好所有的设置并开始渲染。这个软件最棒的一点的是,在渲染完以后,他还会保存关于渲染的所有设置。
That is basically it for the lighting, it’s a really simple light scenario that works really well with almost any type of scene.
Now for the rendering, as you probably guessed by now, I used V-Ray. From the beginning of the project I had some restrictions to work with. For example the animation, it could be just the simple fly through, no animated objects, no trees and bushes waving around, nothing moving except the camera. Having objects move would have dramatically increased the render time, and that’s something I just couldn’t have because I was rendering the thing on my two home workstations.
Regarding the render setup, up until this point I’ve always set everything up manually but after I tried solidrocks there’s no turning back, at least not for animation. The whole plugin and it’s Fly-through Animation Wizard is a HUGE time-saver, and I can’t emphasize the word huge enough. Usually, after you finish the testing, you would crank upthe subdivisions of the materials, lights and GI, then pre-calculate the light cache, then irradiancemap and THEN start to render. Sometimes you forget a step, sometimes you can’t wait for the pre-calculations to finish and you miss your night-time worth of rendering… a lot of things can go wrong… solidrocks does every step with just a few clicks.
Here’s the interface, you basically set the GI method, quality and specify render output path and the plugin automatically cranks up all the settings and calculates all the steps and starts rendering all in one go. And the best thing, after it’s done it restores all the settings the way they were. Awesome!
对于如何使用这个插件我不会详细说明。这里有一个官方视频能教你更好的操作。
I won’t go into detail about using the plugin as there’s an official video tour that does it far better than I ever could.
值得说明的是,因为这是一个动画的项目,在最后渲染之前我做了大量的工作以及测试。我准备了大致100帧的预览并将它们在premiere进行排序。这些只是标准的预览文件,也就是你在视口中看到的文件,但是他们能够很好地帮助我们进行帧位置的编辑,然后你就确切知道应该去渲染哪些帧。
It’s worth mentioning, since this is an animation project, I did do an extensive testing and previewing before committing to the final render. I did approx. 100 shot previewsand edited a preview sequencein premiere. Those were just standard max preview files, so basically what you see in viewport, but they do help a great deal to do a placeholder edit, then you know exactly what frames to render.
我最后渲染了47帧,24帧室外23帧室内场景,42帧通过最后的剪辑并放入最后的动画中。
在渲染通道的调节中,我也只进行了雾化效果以及景深的调节,以及天空的自发光调节。
最后,为了渲染这2分半的动画,我在我的两台机器上花费了一整月的时间,且不说期间还得到了一个专业朋友的帮助。室内渲染的平均速度是25分/帧,以及室外是14分/帧,然后我却喜欢室外渲染出来的效果。
I eventually rendered out a grand total of 47 shots, 24 exterior and 23 interior ones, and 42 of them survived the cut and made it into the final short.
As for the render passes, the only ones I rendered out were the ZDepthfor fog and depth of field, and the self illumination passused mainly for the blown out sky.
With all this said, the rendering for the two and a half-minute piece took a whole month on my two machines, and with an occasional help from a friend. The interior shots averaged at 25 min/frame and exterior ones at 14 min/frame, which is ironic since I like the way they turned out more than the interior ones.
后期制作
现在到了我最喜欢的部分!谁不喜欢后期制作呢?
这也许是一个你把所有工作整合并惊叹自己完美工作的时刻,或许这也是一个你把所有东西弄得一团糟而不得不重新来过的过程。
我决心从头讲起,因为后期工作实际上很早就开始了。前面我已经提到过我有一个ae的准备设置,具体见下图:
Post Production
Now for my favorite part! Who doesn’t like post production?
It’s the part when you put it all together and marvel at your work, or you find out that you messed up miserably and have to re-render.
I’m going to start from the beginning because the post work actually starts in early stages. Earlier I mentioned I have a preset after effect file, well here’s how it looks :
在ae设置一系列调整图层,效果以及过滤器以达到24帧/秒的电影效果的工作,着实是一项创作。他们都处于默认设置,这就意味当我把他们导进来后,我得调节每一帧的参数。因为每一帧都是不同的,所以也不可能让电脑帮助你做这些事。这是最重要的一步,因为你可以控制它最后呈现的渲染效果,不满意的话还可以再改。我很依赖red giant插件来帮助我,但是你也可以使用ae的基本颜色处理工具完成。
让我们看一看这一镜头,这是原始渲染的效果:
It’s basically a composition set to 24 frames/sec (more cinematic looking, and less rendering) with a couple of adjustment layers, effects and some filters. They are all on default settings, meaning when I import the image sequence I still have to grade each shot individually. There’s no such thing as letting your computer do the work for you here, as every shot is different. I find that this is the most crucial stage, as you can really push the look of your renders, and often times re-purposethem if they don’t seem all that appealing on the first glance. I rely heavily on red giant suite, but you can do this with the basic after effects color correction tools.
Let’s take a look at this shot, here’s the raw render :
使用了所有颜色调整渐变后的效果:
And now with all the color grading and effects :
在我看来这是完全不同的。让我们来一步一步分解。
带有曝光效果的原始渲染图。其实它并不用于这一镜头中,只不过有时候我习惯于开始提亮或压暗整个场景。
There’s a dramatic difference in my opinion. Let’s do a step by step breakdown.
Raw render with exposure effect. It wasn’t used in this shot but I sometimes brighten or darken it in the beginning.
使用Zedpth产生雾化效果,看上去很轻微。
Inverted ZDepth layer used for the fog, very subtly.
我同时调节曲线压暗前景。
I also applied levels in order to darken the foregrounda bit.
下一步便是使用magic bullet looks插件,这是你给画面定主色调以及一些重光照的一步。一般典型的基本设置是使用曲线增大对比度,调节光的散射以及一些色彩偏差,调节曝光点以免影响画面。关于调色我经常使用相反的颜色,最后调节色彩、色调以及饱和度,因为后面很可能画面会过饱和。
Next comes the magic bullet looks, this is where you start introducing the main color grade, as well as some relighting. The typical setup is some curves and popfor the contrast, diffusion for the glow, some chromatic aberration and spot exposures for isolating places of interest in the shot. Then for the grading I always use a couple of crushes with opposite color temperature, three way coloristaand hueand saturationat the end, because the image can easily become over-saturated.
然后我使用曲线以及MisFire vignette插件使画面变亮。我不喜欢用magic bullet looks因为他不够智能,使用MisFire可以只使画面中的暗部变暗,使画面更加自然。
After the looks I apply some curves to brighten the shot just a bit and MisFire vignette.I don’t like the magic bullet looks vignette as it’s fairly uniform, I think the MisFire gives it that really organic look, where it gets darker only in the darker areas of the image.
用一点光晕效果来调整图层,来点亮区域。
Adjustment layer with glow effect to introduce blown out areas.
自发光通道以及光晕效果将天空显得更加深远并使整个画面都有了蓝色光晕的效果,就和参考图片中的一样。
Self illumination passwith glow effect to blow out the sky even furtherand introduce some of that blue glow that was all over the reference photos.
为了调节画面的景深我使用了frichluft插件。它能轻松表现虚焦的效果,最棒的是,你可以自定义虚焦的形状和位置。前面提到过,我想达到一个失真的效果,所以我使用默认带细边的圆形,调节了一下它的长宽比去虚焦。
For the depth of field effect I used the frichluft plugin.It produces beautiful out of focus effect very easily, and the best thing you can control the look of the bokehand even make your own custom shapes!As I mentioned, I wanted to a achieve a certain anamorphic look so I just used a default circular shape with a thin border and changed the x-y aspect.
你可以看到前景的树桩的效果变化。
You can see the effect on the tree stumpin the foreground :
这是我在ps做的渐变效果,然后调节了色彩和饱和度,以及20%的不透明度。这可以添加一些冷光。
This is just a gradient that I’ve made in Photoshop, then applied hueand sat with colorize checked, put it on overlay with 20% opacity. This introduces some cooler light.
我用colorista做了第二个调色渐变。这个插件有无数多选项,你就这样使用它就能得到很好的效果,但是我习惯使用多个调色图层。
Then for the second grading pass I use colorista. Now this plugin has a ton of options and you can just use that and get a great looking image, but I like layering in different color grades.
影视特效中最后一步就是调节一些对比度以及颗粒感,减少画面的饱和度。
For the last step In After Effects I apply an adjustment layer with some contrast, film grain and desaturate the image just a touch.
一旦我做完这些我就会把每一个镜头导入premiere中相应的素材位置上,并使用film convert数字转胶片插件将其转化。这一步除了可以帮你实现电影画面感,还可以使画面更加富有真实生动的电影颗粒感。
Once I’ve done this for every shot I’ll import them into premiere on top of my placeholder footageand apply the film convert on all of my finished shots. This is the last grading pass I’ll use, and other than converting your footage to film look it has a great option for adding real, organic film grain to your image.
这里是教程:
Here’s a tutorial :
这就是后期制作的基本流程,记住每一个镜头都要从头来过,因为对于每一个镜头的处理都是不同的。整个调色过程也是一个很主观的过程,没有特定的公式告诉你如何去做,因为每个人想法都是不一样的。
我同时也想尝试一下使用一些有趣的技术去避免不必要的渲染。这两个静止的镜头是在相机被锁住或手持的情况下拍摄的。
That’s basically it for the post, just keep in mind that every shot needs to be treated from the bottom up, because what works on one shot doesn’t necessarily work on the other. The color grading is a highly subjective process, there’s no set in stone rule on how to do it, what appeals to me may not appeal to you and vice versa.
I also wanted to touch upon a couple of interesting techniques to avoid unnecessary rendering. These two shots were supposed to be still shots, where the camera is locked down or hand held.
所以渲染一个静止的镜头时,假如场景中并没有动画,就没有必要去渲染72帧。实际上我只需要渲染一个添加了震颤和旋转效果的高分辨率的画面。
So when rendering a still shot if there’s no animation in the scene it doesn’t make sense to render the 72 frames. Instead I rendered just a single image in slightly higher resolutionand then applied some very slight wiggle positionand rotation expressions.
景深和电影颗粒感在单帧中也是同样处理。这样可以节省很多时间。
另外一个节约时间很棒的方法就是使用ae的时间重置功能。也许你需要4秒时间的短镜头,那就是说需要96帧(24帧/秒)。但是你可以只渲染72帧然后用时间重置功能挪动帧的位置使帧融合,这样你就又有了96帧!
That in conjunction with animated DOF(depth of field ) and some film grain made for a convincing hand held shot with just a single frame from max. A lot of time saved.
One other good technique for trimming away render times is the after effects time remapping option.Basically if you need a 4 seconds shot, that’s 96 frames at 24frame/sec. Well you can easily render out 72 frames and then use time remapping with frame blendingset to pixel motionand now you have 96 frames!
很神奇对吗?这是一个很棒的小招术,但是会受到拍摄手法的局限性。拍摄的越慢越好,过快会产生一些不自然的现象。然后我还发现,在室内镜头表现的更好。如果你试着在有很多树叶的室外使用,会产生轻微的闪烁。
最后这是整个过程的gif:
Awesome right? It’s a good trick but it has some limitations, namely the camera movement. The slower the better, if the camera moves fast it can produce some nasty artifacts. Also as I found out, it works better in interior shots. If you try to use in on exteriors with a lot of foliageit can produce some slight light flickering.
For the end here’s the complete process in one gif
结语
我认为这个初始项目无论在哪个创意行业,从家具设计到3d动画,提升的空间都还有很大。这真的是一个让我激情四射的项目,我从来没有这么开心的工作过。并且它也是一个让我学习的好机会,设置一个门槛并努力去达到它,然后你完成的每一项工作都会让你的门槛更高。
谢谢每一个看这篇文章的人!我希望你们学到新的东西。
谢谢关注。
Conclusion
I think that self initiatedprojects are very important to becoming better at any creative aspect. It’s applicableto any creative industry from furniture design to 3d animation. This was a passion project and without a doubt the most fun I have ever had working on something. These projects are a great opportunity to learn a ton of new things, you just have to set a bar and strive to reach, and with every new project push that bar higher and higher.
Thanks to all who even took a glance at this making of, and to those who went through it all, you’re awesome! I hope you learned something new.
Thank you for the attention.
Sava Zivkovic.
出处:本文译自www.ronenbekerman.com/,转载请注明出处。
|
|