Plan Oblique Illustration: Part 2
上个星期我介绍了由SketchUp模型生成平面轴测图的工作流程。这周,我想介绍怎样把 SU 导出的图片增加色彩和材质。创建上面的图的操作步骤并不是一门科学,某些步骤可以被修改、移除、调整,甚至可以按你的想法进行试验。我很晚才进入这个阶段,因为我把图亮度调的很高,且颜色的饱和度极高,直到我发现这并不适用于每一张图片。
首先请看一下上一篇博文,了解一下上图的一些背景信息,并明白如何生成这个角度的图片。
Last week I described the work flow of generating a plan oblique illustration from a Sketchup model. This week, I wanted to follow that up with how I added color and texture to the SU exports to achieve the image above. The steps to create the above image are not a science, and certain moves can and should be changed, removed, tweaked, and experimented with. I have been in this phase lately where I have been pushing illustrations with bright, extremely saturated colors which may not be ideal for every presentation.
Be sure to check out last weeks post for a little background on this image and to get more explanation on how to generate these views.
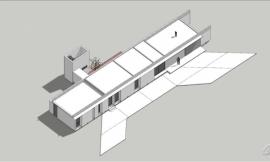
1)开始,从 SketchUp 中导出下图的 4 张图片。
1) To begin, export the 4 images below from Sketchup.
2)打开 SketchUp 导出的“阴影纹理”的图片,拖入PS中。打开“图像-调整-色阶”。在对话框中,先选择“着色”。增加饱和度,并调整色调到你想要的效果。
2. Open the Sketchup “shaded with textures” exported image in Photoshop. Go to “Image>Adjustments>Hue/ Saturation”. In the dialogue box, check “Colorize”. Increase the saturation and adjust the hue to get the tone that you want.
3)接下来,打开 SketchUp 的“X-Ray 效果”的图片,并和上一个图层对齐。并把“X-Ray 的图片”混合模式设为“正片叠底”。
3. Next, open the Sketchup “x-ray” exported image and align it above the previous layer. Set the blend mode of the x-ray image to “Multiply”.
4)打开“阴影”的 SketchUp 图片,再次对齐图层。再把图片混合模式设为“正片叠底(Multiply)”。
4. Open the Sketchup “shadows” exported image and align it above the previous to images. Set the layer blend mode of the shadows layer to “Multiply”.
5)打开PS中SketchUp 图片的“轮廓线”,和前三个图层对齐。打开“图片>反向”设置。
5. Open the Sketchup “Profile” exported image in Photoshop and align it above the previous 3 layers. Go to “Image>Invert”.
6)设置“轮廓线”图层的混合模式为“变亮”。
6. Set the layer blend mode of the profile image to “Lighten”.
7)接下来的步骤可能不适用于每个人,但是我在Kerkythea里创建了一张快速的素模渲染,给图片增加一些深度。这里有关于怎样创建这个 Kerkythea 素模渲染的教程。
7. This next step may not be necessary for everyone, but I created a quick clay rendering in Kerkythea to add a little depth to the image. A tutorial on how to create a clay rendering can be found HERE.
8)把素模渲染的图片放入 Photoshop 中并把它的图层移至顶端。设置混合模式为“正片叠底”。在这一步中,渲染图会像下图。看起来还是不太好看。
8. Bring the clay rendering into Photoshop and set it as the top layer. Set the layer blend mode to “Multiply”. At this stage, the illustration looks like the image below. Still not looking that great.
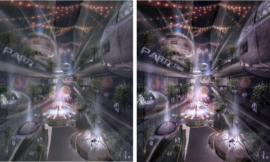
9)接下来,我添加了一些颜色条纹来打破单调的背景。创建一个新图层,然后选择“矩形选框工具”,并且画一个矩形选区。用“油漆桶工具”,填充选区。
9. Next, I threw in some color stripes to break up the monotonous background. Create a new layer, then choose the “Rectangular Marquee Tool” and draw a rectangular selection. With the “Paint Bucket Tool”, fill in the selection.
10)设置条纹图层混合模式为“叠加”。在某些情况下,不同的混合模式可能比其他的效果更好,所以在选择默认的叠加模式之前,要尝试一下不同的选择。
10. Set the layer blend mode of the stripe layers to “Overlay”. In certain situations, different blend modes may work better than others, so test out other options before defaulting to overlay.
11. 我通常喜欢在我的图中增加一点点的纹理效果,所以我会添加一个叠加的草图纹理。把材质拖入 Photoshop(只需要 Google 关键字“Grunge”,有成千上万的结果),把它移到图层的最顶端,并把混合模式设置为“叠加”。
11. I typically prefer a little texture in my illustrations so I am going to add a sketch overlay.
12. 如果你没有看过这个系列的第一部分,那么这一步将没有多大意义。为了完成真实的平面轴测图,我需要纵向拉伸图片到 141.421%。我首先增加画布的大小,使其拥有更多的空间来拉伸图片。然后我选择所有的图层,选择“编辑>变形>比例”,并在水平方向上输入 141.421%。如果渲染图比例正确,每根线都会精确且可以测量。甚至垂直的线也可以被测量。
12. If you haven’t seen part 1 of this series, then this next step won’t make much sense. In order to make this a true plan oblique, I need the stretch the image vertically by 141.421%. I did this by first increasing the canvas size to make room for the newly stretched image. I then selected all of the layers, chose “Edit>Transform>Scale” and typed 141.421% in the horizontal attribute. Once this is done, the plan of this image will be all 90 degree angles. If the illustration is scaled properly, every line will be measurable and accurate. Even vertical lines will be measurable.
13. 最后,我拖入一些平面图,并设置它们的混合模式为“正片叠底”,这样我只留下了边线。我现在没有完整的平面图,所以我只用导出的 SketchUp 图片。
13. Finally, I brought in some floor plans and set the layer blend modes to “Multiply” so that I was left with only the line work. I don’t have completed floor plans yet so I just used exported Sketchup images.
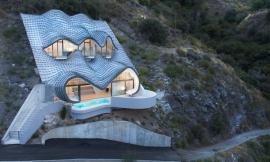
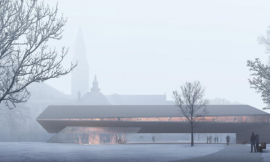
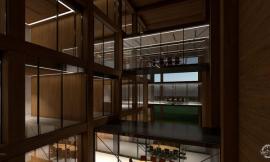
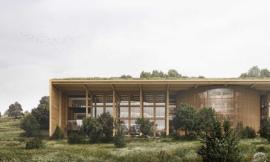
下图就是完整的渲染图。我喜欢这类渲染图的原因之一是因为这是一个经典的样式。而且我也喜欢其展示出了独一无二的风格,同时也提供了很实用的可以测量的信息。我用了很方正的建筑设计来应用这种渲染图,但是,我能想象有机形式应用这种风格也会很好。
Below, you can see the completed illustration. What I like about this type of illustration is first, its vintage style. I also like how it shows off the form in a unique way, while also providing measurable information making it very functional. I used a very orthogonal building design for these illustrations, however, I can imagine organic forms working well with this style too.
出处:本文译自visualizingarchitecture.com/,转载请注明出处。
|
|
专于设计,筑就未来
无论您身在何方;无论您作品规模大小;无论您是否已在设计等相关领域小有名气;无论您是否已成功求学、步入职业设计师队伍;只要你有想法、有创意、有能力,专筑网都愿为您提供一个展示自己的舞台
投稿邮箱:submit@iarch.cn 如何向专筑投稿?