PS分析图制作
Managing Diagrams in Photoshop
由专筑网李韧,韩平编译
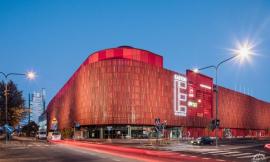
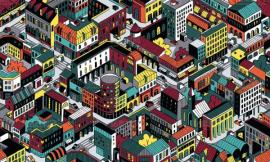
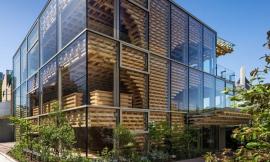
近期,我一直在研究如何清晰地表达沙漠小屋项目的玻璃幕墙的设计构思。于是我制作了一些图来表达思路。当我把这些图放在一起时,我相信能够直观地表达我的分析图组织方式。我运用了一些智能对象来控制尺度、清晰度,以及通过编辑来控制某个元素对于整体布局的影响。正如下文所示,我运用了两个PS文件来控制单个元素以及整体布局。在我写了一篇关于“智能对象”的教程博客的几个月后,我便开始了PS的深层研究,在这里你可以发现这个软件的诸多优势。
I have been testing out a ton of different ideas for how to articulate the glass facade for the Desert Trench House project. From those studies, I developed a spread that shows some of the iterations that were generated. As I was putting this illustration together, I thought it might be helpful to break down how I typically organize my diagram files. I use a lot of smart objects to control size, sharpness, and ability to edit as I move stuff around on the page and try to figure out the composition. As you will see below, there are two Photoshop files being used to manage the individual elements as well as the overall layout. I wrote a post about smart objects a few months back that goes into more depth about the advantages of using smart objects in Photoshop which can be seen HERE.
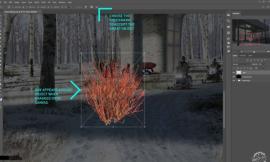
1、PS文件初始化设置:个人选项
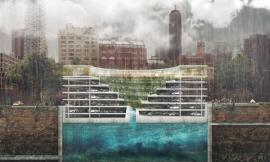
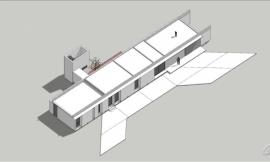
1、A—在起始阶段,我将PS设置为能够容纳各种立面选项的模式。“基础”文件夹中包含有我用于制作不同效果的底图文件,此时,我直接将SU文件导出,并增添了一些粗线轮廓。
1. Setup Base Photoshop File: Individual Options
1.A – Getting started, I setup a Photoshop file that would house the different facade options. The “BASE” folder contained the base images that I would overlay the different facade options onto. For this illustration, I used an exported Sketchup image with some thickened ground lines and profile lines.
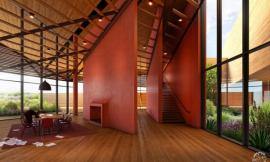
1、B—然后,我便开始测试一些不同的立面风格。每个图层都保存在组中,这样我就可以方便地来回切换不同的风格,并且进行任意的排列组合。
1.B – From there, I started testing out some different facade options. Each move was saved within a group so that I could easily toggle on and off different options quickly and start to play around with different combinations.
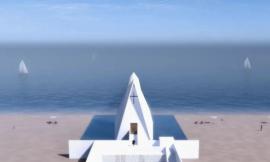
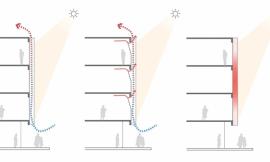
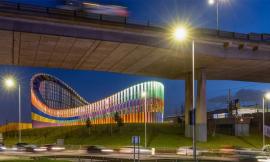
1、C—通过两个组的创建来表达白天与黑夜不同的场景切换。这样能够便于查看不同的设置选项,从而研究立面系统的变化。
1.C – Two other groups were created that would turn the image into a night scene when toggled on. This would allow me to view each option in both a daytime and nighttime setting to study how the reading of the facade systems change.
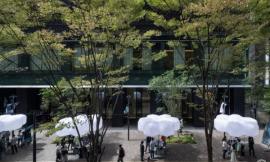
1、D—最后,当我完成测试,就将每个选项按照白天与黑夜的不同版本导出成图片格式。
1.D – Finally, when I finished experimenting, each option and combination was exported as a jpeg in both day and night versions.
2、主体文件的设置:出图与肌理
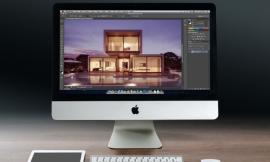
2、A—接下来,我们创建一个新的PS文件,并且设置好打印所需的图像大小和分辨率。然后将已经制作好的立面图像拖入PS文件中。当图片刚被拖入时,周围会有一个矩形框,这说明这是一个智能对象,此时我可以改变图像的大小,也可以将它移动至所需的位置。
2. Setup Master Photoshop File: Layout and Textures
2.A – Next, a new Photoshop file was created that would serve as the “Master” Photoshop file and was setup based on the size and resolution I needed for printing. I began by dragging the first facade option jpeg into the new Photoshop file. When the jpeg is dragged in, you will see a bounding box around it letting you know that it came in as a smart object. From there, I scaled it to the size that I wanted and then hit the check mark at the top to finalize the move.
2、B—在拖动的过程中,保持每个图像的大小完全一致非常重要。如果拖动每一个图像,然后手动改变它的大小,这并不是一个聪明的办法。于是,我总是在第一个图像上右键点击创建副本,这样便有了与前一个对象大小相同的图像。
2.B – It is important to keep all of the options exactly the same size. Instead of dragging in each option and scaling the best I can to match the other options, I am going to use a different method. I right-clicked on the first option layer and chose “New Smart Object via Copy”. This creates a unique copy of the smart object.
2、C—接下来,右键单击副本,然后选择“替换内容”,此时会弹出一个对话框,然后你可以选择你将要导入的图片,然后点击“替换”。此时新的图像便替换了旧的图像,同时两个图像的大小也完全相同。于是我便不断重复这些步骤,把所有的图像都放置到同一个PS文件中。
2.C – Next, I right-click on the new copied smart object layer and choose “Replace Content”. In the dialogue box that appears, browse to a new facade jpeg option and choose “Replace”. The old option was replaced with the new option while maintaining the exact same size. I repeat these steps until all of the options have been placed on the canvas.
3、添加纹理
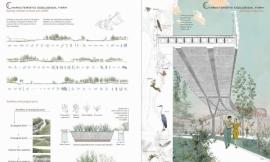
我之所以没有选择运用ID来进行布局的原因是我喜欢为图像增添一些纹理感。因此,我在图像上方添加了一些纹理图案,并将它们叠加在图层顶部,然后再设置一些线性质感。这些步骤我在以前的文章中介绍过,最终整个图像看上去具有粗糙的颗粒外观。
3. Apply Textures
They reason why I didn’t use a program like InDesign to layout the different options is because I like to paint and add texture quite a bit over the entire spread at the end of the process. For this diagram, I compiled a few sketchy textures and began overlaying them on top. I also painted in smudges and roughed up some of the line work. I used some of the methods described in this really old post about creating the “Sketchy Look”.
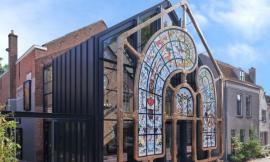
最终成图
以智能的方式让你的图像清晰地导出。正如本文所介绍的PS文件以及肌理感的添加,这样整个图像便于后期的编辑。希望以后我可以探索出新的方法,能够不花多余的时间就能轻松导入或替换其他选项。
Final Images
Setting up your files in a smart way will lead to cleaner images and huge savings in time down the road. As much as this illustration is Photoshopped and textured, it can still be edited quite easily. If later on, I come up with some new options, it will take no time to insert them into the spread or simply swap it out some other options.
出处:本文译自visualizingarchitecture.com/,转载请注明出处。
|
|
专于设计,筑就未来
无论您身在何方;无论您作品规模大小;无论您是否已在设计等相关领域小有名气;无论您是否已成功求学、步入职业设计师队伍;只要你有想法、有创意、有能力,专筑网都愿为您提供一个展示自己的舞台
投稿邮箱:submit@iarch.cn 如何向专筑投稿?