SMART OBJECTS INTRO
由专筑网严越,刘庆新编译
距离上一个不错的ole教程已经隔了好久了。但是你要是还不清楚ps里智能对象功能,那么这节课对你就很重要了。它把ps编辑图像的功能提升了一个档次,在我们Design Distill公司几乎每张图都要用到这个,让编辑更快,更整洁一致。智能对象功能存在一定局限,但是仍然值得加入每个人的工作流程里。下面是可以使用的几个例子。
那么在ps中的智能对象是什么?当你创建一个智能对象时,Photoshop会保存源图像原有的特性。当你在调整比如色阶或色相/饱和度时,Photoshop将这些入智能滤镜,这样以后你可以撤消这些更改。缩放和扭曲智能对象也不会影响稍后的图层。另一个优点是复制智能对象,副本会创建整体上相互的实例。这在概念上类似于 AutoCAD 中的体块或草图大师里的组件的运作。更新一个实例就能更新全部。最重要的是,对智能对象的无损更改对于要求精确的ps文件至关重要。
It has been a while since I have created a good ole tutorial. This is a really important one if you don’t already know or use Smart Objects in Photoshop. Smart Objects bring a whole new level of ability to edit in Photoshop. At Design Distill, we use them in every image we create. They have streamlined how fast we can create images, and more importantly, allow editing to be much quicker, cleaner, and consistent. Smart Objects take some getting use to and have some limitations, but are something everyone should be integrating into their workflow. Below are a few examples of how they can be used.
So what is a Smart Object in Photoshop? When you create a Smart Object, you are telling Photoshop to save the original characteristics of the source image. When you edit a Smart Object such as adjusting the levels or hue/saturation, Photoshop will turn these into Smart Filters allowing you to undo these changes later. Scaling and distorting a Smart Object also does not degrade the layer as shown a little later on. Another advantage is that copies of Smart Objects create instances of each other. This is similar in concept to how blocks work in AutoCAD or components in Sketchup. Updating one instance will update them all. Most importantly, changes to a Smart Object are non destructive which is crucial for sharp and editable Photoshop files.
1. 创建智能对象/Creating a Smart Object
选项 A/Option A
创建智能对象有几种方法。第一个是直接拖动文件进入 PS文件。我用的是PSCC,这个方法可能对于更早的版本并不适用。如果你拖动.jpeg格式或是.png格式的文件到已打开的 PS 文件里时,该图像会作为智能对象进入图层,周围有边界框显示。点击上面确定,接受智能对象进入文件。
There are a few ways to create a Smart Object. The first is by simply dragging a file directly into a Photoshop file. I am using Photoshop CC so this method may not work on older versions of Photoshop. When you drag an image file such as a .jpeg or .png into an open Photoshop file, the image will come in as a Smart Object and have a bounding box around it. Hit the check mark at the top to accept the Smart Object into the file.
选项B/Option B
当你想在对已有图层进行色调或缩放调整前置入智能对象时,把图层转为智能对象。
右键单击图层名并选择“转换为智能对象”。
In some situations, you may already have a layer in Photoshop that you want to convert into a Smart Object before making adjustments such as toning or scaling. To turn a layer into a Smart Object, right-click on the name of the layer in the layers palette and choose “Convert to Smart Object”.
然后图层上会有个小图标显示是智能对象,Photoshop就保存了现在的图层状态,并且之后该图层的所有更改,会在图层面板中图层下方的智能滤镜里显示。此状态的更改都能撤销。
After choosing “Convert to a Smart Object”, you will see a small icon on the layer which lets you know that it is now a Smart Object. Photoshop has now saved the state of the layer and changes made to this layer will now show up as Smart Filters underneath the layer in the layers palette. Changes up to this point will be able to be reversed back to the state of the layer at the time of the conversion to a Smart Object.
2. 缩放/Scaling
缩放是在PS里使用智能对象的最主要原因之一。此示例现实的两个红色的灌木丛中,一个是智能对象,另一种是只是简单的栅格化Photoshop图层。
Scaling is one of the biggest reasons to use Smart Objects in Photoshop. This example shows two red bushes, one is a Smart Object, the other is just a simple rasterized Photoshop layer.
一般在视觉化效果中,置物盒随行人员这样的目标经常要多次调整缩放以按正确比例放入环境。这里我要把红灌木放在远景,所以要缩小一些。
Often in architectural visualization, objects such as plants and entourage are scaled many times when trying to place them in a composition. In this case, I decided to push the red bush into the distance, thus I needed to scale it much smaller.
两个对照组都缩小后,智能对象仍保持原有清晰度,因为它还在引用最初存储的图像信息。非智能对象的清晰度已经严重降低。缩放、扭曲,和旋转次数越多,非智能对象的清晰度会继续变差。但无论多少次调整,智能对象会始终保持原始清晰度。
When both bushes are scaled back up, the Smart Object maintains the original sharpness because it is still referencing the original stored information of the image. The non-smart object’s quality has been significantly degraded. The more times that the non-smart object is scaled, distorted, and rotated, the quality will continue to degrade. The Smart Object will always maintain the original sharpness no matter how many times it is manipulated.
3. 智能滤镜/Smart Filters
类似于调整大小,植被、随行人员和底层文件等元素往往需要色调调整。使用智能对象,色调调整自动变成智能滤镜。也就是说所有的原始数据像颜色调整,色阶和曲线变化和其他色调调整都保存在右边,你能随时调整。在此示例中,我添加了红灌木,把它变成智能对象。
Similar to resizing, elements like vegetation, entourage, and base files often require lots of toning adjustments. With Smart Objects, the toning adjustments are automatically turned into Smart Filters. This means all of the color adjustments, level and curve changes, and other tone adjustments are saved right next to the layer, allowing you to tweak, add to, or fully remove the adjustments at any time. In this example, I added a red bush and turned it into a Smart Object.
我想把灌木放在阴影处,就用“色相/饱和度”和“色阶”加深阴影,在图层面板,这些调整按照创建顺序出现的“红灌木”的图层下。
Later on, I decided to move the bush into the shadow, so I darkened the bush using “Hue/Saturation” and I adjusted the “Levels”. You will notice under the “Red Bush” layer in the Layers Palette, that these adjustments appeared in the order in which they were created.
要是我先把灌木放回亮处,想把阴影效果取消,把智能滤镜关掉。也可以把滤镜都删除。如果灌木本来不是智能对象状态,你很难调整到原先的色调,那我可能就要重新置入文件一次。
Later, I again decided to move the bush back into the light. I wanted to revert back to the original tones of the bush, so I simply turned off the Smart Filters. You could also delete the filters altogether. If the bush was not a Smart Object, it would have been very difficult to get the color back to its original tones and I would have most likely needed to reinsert it again.
4. 复制得到单独个体/Copying As Instances
你可以把智能对象当做 AutoCAD 模块或草图大师的组件一样的个体使用。智能对象复制多次后,图像可以替换成一个新的图像,所有副本一起更新。按住Alt键再点击拖动,能多次复制红灌木,用智能滤镜变暗,也可以水平反转灌木。
You can use Smart Objects as instances of one of another similar in concept to blocks in AutoCAD or components in Sketchup. This means after a Smart Object has been copied several times, the image can be replaced with a new image, and all of the instances of that Smart Object will automatically get updated. In this example, I copied the red bush several times by holding down the “Alt” key, clicking and dragging. For the bushes in the shadows, I added some Smart Filter adjustments to darken them. I also horizontally flipped the bush on several occasions.
然后我想把红灌木替换成棕色灌木。打开原始红灌木的图像,隐藏,再置入棕灌木,保存为新文件。要确保两者像素单位相同。
Next, I want to replace the red bush with a brown bush. To do this, I first opened the original red bush image, turned it off, and brought in the new brown bush. I then save the brown bush as a new file. It is important that the new image file is exactly the same size in pixels to the original image file used to create the Smart Object.
在图层面板里的智能对象里右击并选择“替换内容”。在弹出的窗口中,浏览找到要替换的新文件。在这个实例里,是找到棕灌木。
Back in the illustration file, right-click on one of the Smart Object instances in the layers palette, and choose “Replace Contents”. In the pop-up window, browse to the new image that will replace the current Smart Object file. In this case, I am browsing to the new brown bush file.
然后红色就全换成棕色灌木了。所有的缩放,智能滤镜,和水平翻转的更改都保留。
All instances of the red bush have now been replaced with the brown bush. All of the scaling, Smart Filters, and horizontal flipping remain.
5. 把底层文件转换为智能对象/Turning your base files into Smart Objects
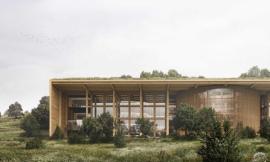
如果后期还有大量剪辑,把所有底层渲染文件都变成智能对象能剩下大把时间。底层渲染文件需要多次扭曲,来和图像相匹配。而要和新渲染图象调整到一致几乎是不可能的。智能对象就能解决问题。使用智能对象,把新的文件替换原来的底层文件,所有的颜色调整和缩放都能保留。在此示例中,我拿一个研究实验室设计基地举例,先转换成智能对象,图层名称上右击并选择“转换为智能对象”。
Bringing in all of your base rendering files as Smart Objects can save a lot of time later on down the road if you plan on making a lot of edits. For one, there are many times when the base renderings need to be distorted to match a photograph or drone image. It can be next to impossible to exactly match how a base rendering is distorted with a new updated rendering. With Smart Objects, this is no longer a problem. At Design Distill, we are constantly making changes to the model, and then rerendering new base files to be updated in Photoshop. Using Smart Objects, we simply replace the old base files with the new ones and all of the color adjustments and scaling gets carried over. In this example, I have brought in a base rendering of my research lab design. The first thing that I do is turn it into a Smart Object by right-clicking on the layer name and choosing “Covert to a Smart Object”.
然后做些调整来与现有的场地照片匹配。我还在图层面板中的智能滤镜里调整了颜色。
Next, I distorted the base rendering similar to how I would if I was trying to match it to an existing site photo. I also added some color adjustments which are shown as Smart Filters underneath the layer in the Layers Palette.
然后让旧文件不可视,右键单击图层名,选择“替换内容”。
Next, I want to replace the base rendering with a new rendering that I created that shows the exterior panels turned off. To do this, I right-click on the layer name, and choose “Replace Contents”.
原底层图像就被新的渲染所取代。所有的颜色调整、扭曲及缩放和旧图的一样。如果没有智能对象,我要用肉眼去凑颜色的精准度来和缩放匹配一致。
The original base rendering has now been replaced with the new rendering showing the panels turned off. All of the color adjustments remain and the image is distorted and scaled exactly like the old rendering. If Smart Objects weren’t used here, I would have had to guess the exact color corrections and eyeball the best I could to match the distortion and scaling.
6. 创建单独副本/Creating a Unique Copy
你也不一定都想智能对象都更新数据到和新图像一致。这里的例子是我想用同样的渲染缩放设置,但要想有一个全新可调整的智能对象,那么就右键单击图层名,选择“新智能对象通过拷贝”。
You do not always want to copy a Smart Object as an instance. In other words, sometimes you don’t want the copy to be updated with a new image when other instances of the Smart Object are updated. In this example, I want to make a copy of the base rendering so that I can reuse the exact distortion and scaling changes. But I also want the Smart Object to be unique, so that it does not replace all instances of itself. To do this, right-click on the layer name, and choose “New Smart Object via Copy”.
我就有了所有设置和其他相同的智能对象,但是我只想要保留缩放设置而不是颜色调整。把智能滤镜删掉,在新的智能对象上右键选择“替换内容”,找到像素单位一致的文件替换。
Now I have a copy of the first Smart Object along with all of its scaling and color adjustment properties. I only need the scaling adjustments and not the color adjustments, so I deleted those Smart Filters. Next, I right-clicked on the new layer name and chose “Replace Contents”. I then browsed to the new image that I want to replace the existing rendering with. Again, it is important that both the old and new images are exactly the same size in resolution.
得到的就是材料ID通道和原有一致的新智能对象,其他通道也是一样的处理。
当然智能对象也有局限。成百上千的智能对象文件会比栅格化的图层运行得慢。有好几次我要对许多智能对象进行栅格化,保证PS运行平稳。
此外不能在智能对象上使用颜色加深或颜色减淡工具、 仿制图章或油漆刷工具,也不能使用橡皮擦。你要用蒙版来擦除或栅格化图层来使用。栅格化智能对象,只需用鼠标右键单击该图层名称并选择“栅格化图层”。
智能对象,显然很多用途,我只涉及了少量例子。如果你有在工作中很实用的独特方式,请在下面留下评论。我一直期待着新的想法。
What I am left with is another Smart Object layer of my Material ID Channel that is distorted exactly like the other base rendering. I can use this same technique with all of my rendering channels ensuring they are all exactly distorted and scaled the same way.
As great as Smart Objects are, there are also some negatives. With Photoshop files that have hundreds or even thousands of layers that are Smart Objects, the file tends to run slower than layers that are all rasterized. There have been times where many of the Smart Objects in my file needed to be rasterized to help Photoshop run more smoothly.
Also, you can’t use tools like Burn and Dodge, Clone Stamp, or Paint Brush on a Smart Object nor can you use the Eraser Tool. Instead, you have to use masks to erase or rasterize the layer to use some of the other tools. To rasterize a Smart Object, simply right-click on the layer name and choose “Rasterize Layer”.
There are obviously many uses for Smart Objects, and I only covered a small number of them here. If you have a unique way that you have implemented them into your workflow, please leave a comment below. Im always looking for new ideas.
出处:本文译自visualizingarchitecture.com/,转载请注明出处。
|
|